
Step 1: Verify the Interferometer Size and Standard Mirror F/# The CGH is not independent; it must be used in conjunction with the interferometer. First, you need to confirm the interferometer's aperture size (usually 4 inches or 6 inches). More crucially, the F/# of the standard mirror (TS) is important. The CGH is designed based on specific converging or diverging wavefronts. If your standard mirror's F/# does not match the design requirements, the wavefront cannot couple correctly, and you might not even be able to find a light spot. Expert advice: Before starting, be sure to check the instruction manual to ensure that the TS mirror's F/# is slightly smaller than the CGH's required F/#. Step 2: Determine the Front and Back of the CGH The CGH is a piece of quartz glass coated with a chromium film or etched with micro/nano structures, and it has a strictly defined front and back.
● Principle: The graphic side of the CGH (the side with the etched pattern) must face the mirror under test.
● Identification Method: Observe the markings on the side of the glass, or use light reflection to observe the superimposed image of the pattern. If it is placed backwards, the light will first pass through the thick quartz substrate, producing unnecessary aberrations, causing the test results to be completely invalid.
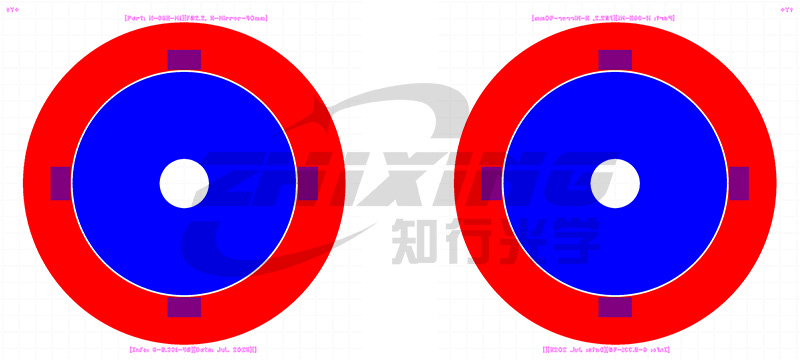
CGH front view (left), CGH back view (right)
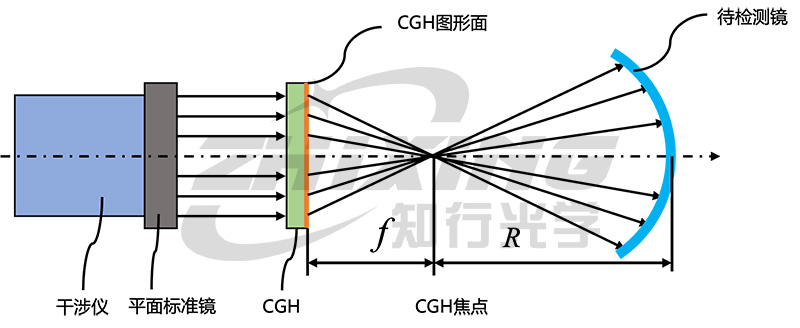
CGH detection optical path (pattern facing the mirror to be tested)
Step 3: Locate the "Coordinates" and Identify the Y+ Marker. The CGH is not only a lens, but also a physical coordinate reference. To ensure the test results match the design documents (such as a Zemax model), the test coordinate system must be determined. Standard CGH surfaces are etched with coordinate markings, usually the Y+ mark. When installing it into the frame, ensure the Y+ mark is aligned with the designated direction of the support. Only when the coordinate system is aligned is subsequent pose adjustment meaningful.
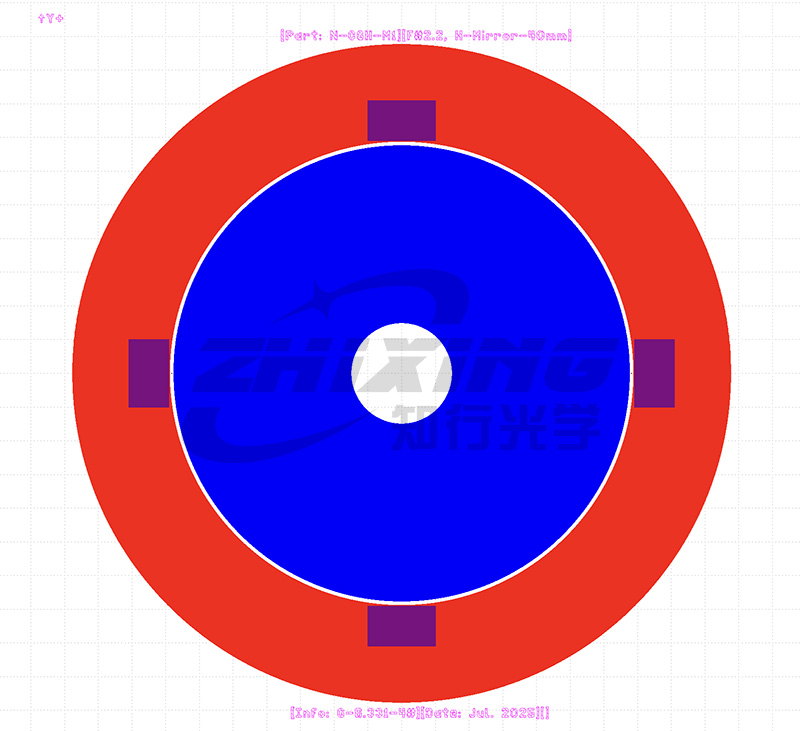
CGH coordinate system identifier (top left Y+)
Step 4: Positioning the CGH and Utilizing "Focus Blocking" to Determine Offset. After placing the CGH into the optical path according to the design drawings, beginners often find a lot of stray light in the optical path. At this time, "focal blocking" is your lifesaver. We place a small hole or light-blocking plate at the design focal point of the CGH and use it to: 1. Determine the offset: This is the most intuitive physical scale. Observe whether the reference light emitted by the interferometer and the returned light converge at the center of the small hole. If the returned light spot deviates, it indicates that there is a significant offset in the pose. By adjusting the 5D adjustment frame to precisely adjust the light spot into the small hole, the system can be initially aligned. 2. Spatial filtering: The light-blocking plate can effectively filter out unwanted diffraction order stray light, purify the interference field, and make the fringes clear and easy to read. Step 5: Fine-tuning the pose to minimize residuals. The final step is to place and adjust the mirror under test. Using the interferometer's assisted alignment area, after initially aligning the feedback light spot of the mirror under test with the main spot of the CGH, the system switches to detection mode. The operational logic at this point varies depending on the mirror type:
● Coaxial aspherical: The focus is on adjusting the fringes to their sparsest possible. Through fine-tuning, the corresponding coma and power are minimized to ensure perfect alignment between the mirror and the optical axis.
● Off-axis aspherical: The logic is slightly different, focusing on ensuring the light spot completely covers the area under test while minimizing RMS (root mean square error). Conclusion: CGH testing is a game of "from coarse to fine." From the "millimeter-level" positioning of pinhole alignment to the "micrometer-level" convergence of the auxiliary light spot, and then to the "nanometer-level" fine-tuning to minimize aberrations, each step of standardization is for the ultimate precision.


